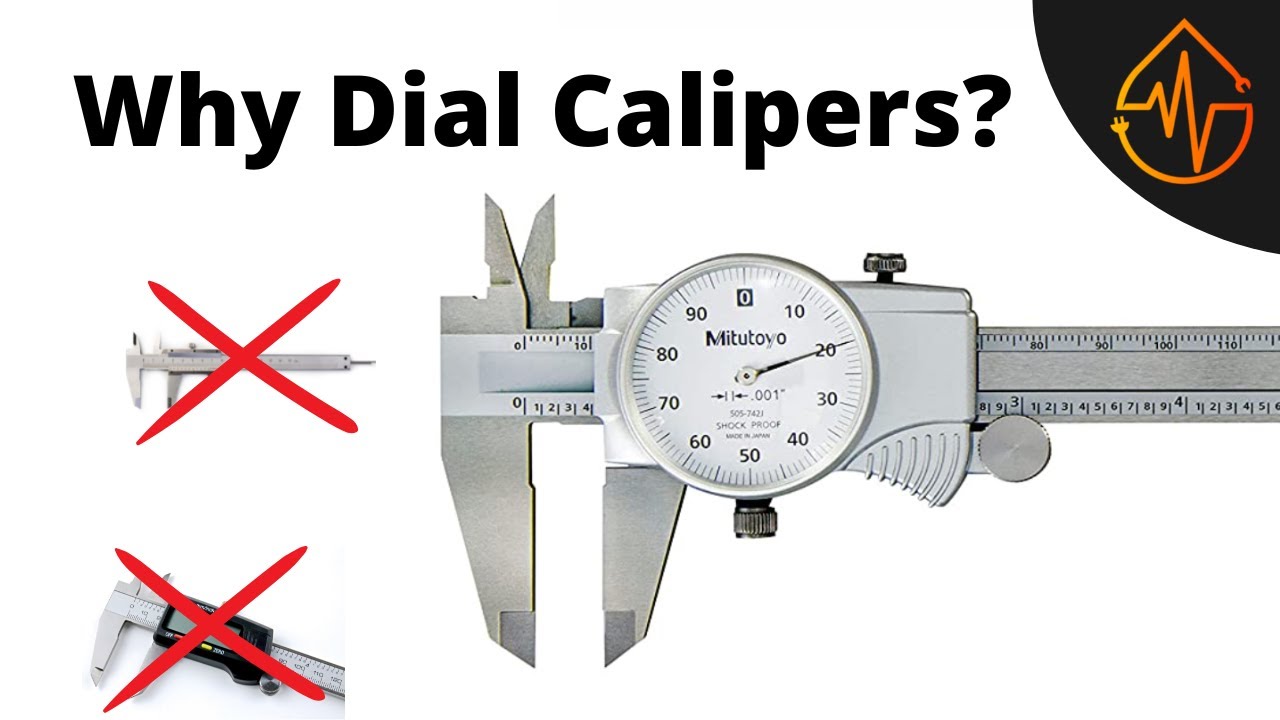
Master the tools of the trade. This module covers the Mitutoyo dial caliper — how it works, how to read it, and how to use it correctly in a seal & fluid power environment.
Familiarise yourself with each component before taking a measurement. Hover over the labels below.

Measure outside diameters, widths, and lengths. The most-used jaw pair.
Measure inside diameters and groove widths — critical for O-ring groove inspection.
Measures depth of holes, slots, and step heights. Extends from the right end.
The main rule. Upper scale = inches, lower scale = millimetres.
100 divisions = 0.001″ each. One full revolution = 0.100″. Read this plus the beam.
Rotates the dial face. Use only to zero the dial — do not use to "adjust" readings.
Locks the sliding jaw in position so you can read the measurement hands-free.
Knurled wheel for smooth, precise sliding movement. Use it for fine positioning.
Reading a dial caliper is a two-step process: read the beam scale first, then add the dial reading. Always combine both.
Close the jaws completely. The beam scale should read 0, and the dial needle should point to 0. If the needle is off, rotate the bezel nut until it aligns. Never force it.
Look at the inch scale on the beam. Find the last numbered line that the sliding jaw has passed. Each major line = 1 inch; minor lines between = 0.100″ each.
Look at where the red needle points on the dial face. Each of the 100 divisions equals 0.001″. If the needle points to 35, dial reads 0.035″.
Total measurement = beam reading + dial reading. For example: beam shows 1.200″ + dial shows 0.035″ = 1.235″.
Reading Example
Avoid the most common mistakes when using a dial caliper.
Before every use, close the jaws fully and check that the dial reads zero. If not, rotate the bezel nut — don't adjust the main scale.
Debris on the jaw faces causes false readings. Wipe with a lint-free cloth. Even a chip of swarf can add 0.002–0.005″ of error.
Use the thumb wheel for a light, consistent contact force. Squeezing the jaws hard onto a part compresses it and gives a low reading.
Hold the caliper square to the work surface. Reading at an angle (cosine error) will always give a reading that is too large.
Always leave a small gap between the jaws when storing — never close them fully. Store in the case, away from magnets and corrosive materials.
For seal work, always note the measurement before releasing the lock screw. Write it down — memory is less reliable than ink.
Caliper measurement is Level 4 of the FluidSeal AB Staff Certification Program. Complete the assessment to earn your official certificate and unlock the next level.
Must complete Levels 1–3 before Level 4 unlocks · Progress saves automatically